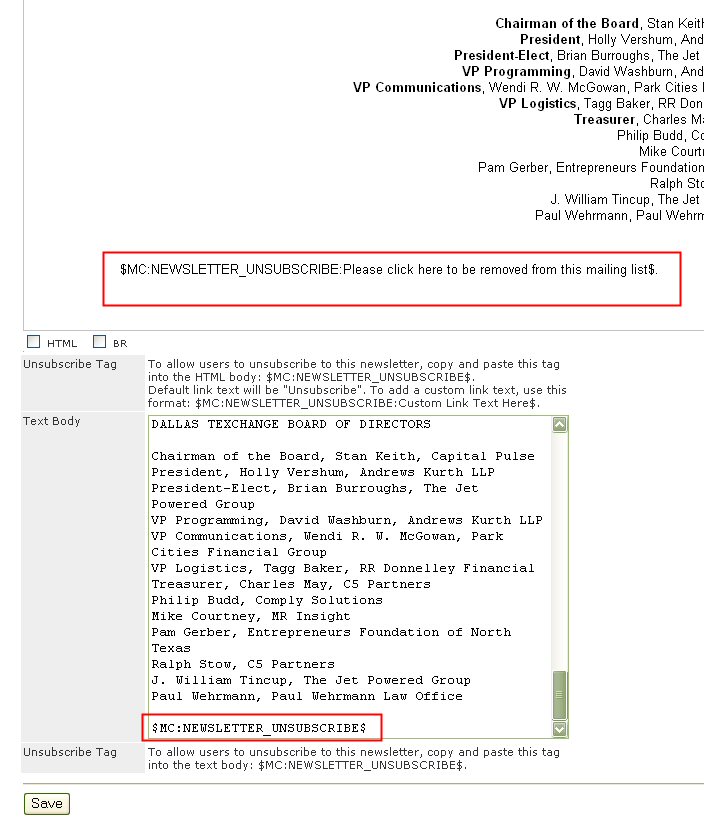
Newsletter Tag placed in the HTML and Text body
The Newsletters feature enables broadcast email (newsletters) capabilities. The feature allows communications to be created in advance and scheduled for delivery. The Newsletter feature also allows new newsletters to be created from existing ones.
While it is possible to send newsletters from the staging environment, it is not recommended for the following reasons:
The newsletter unsubscribe feature will not work on the stage site.
If the newsletter is integrated with a dynamic form that is populating an email list, the list should exist in production.
Always send email communications to real constituents from the production environment.
Before a newsletter can be saved there must be at least one existing email list. It is recommended that email lists be kept and newsletters sent from the production environment because access can be limited to the production environment, an added measure of security.
Best practices suggest that a Test list is created and that a test mail is sent to this list prior to sending a broadcast email to a large number of email addresses. Ideally, several people will receive the test mail to review.
To create a newsletter, follow these steps:
Expand the Communication menu section.
Click the Newsletters link. The List of Newsletters page is displayed.
Click the Add link to create a new newsletter. The New Newsletter page will be displayed.
Check the boxes next to the Email List Types to indicate which email lists should receive a copy of this newsletter. To add new email lists, use the E-mail Lists feature.
Enter Additional Addresses to receive the newsletter. Multiple email addresses can be separated by a comma or semi-colon.
Select the Default Body Type. The choices are HTML or Text.
Enter the From Display Name. This is the name that will be displayed in the From field on the recipients email client.
Enter the From Email Address. This is the email address that will receive responses (when recipients click reply) and bounced emails.
Enter the Subject. This is the subject that will appear in the subject field on the recipients email client.
Enter the Target delivery date to indicate when the email newsletter should be sent.
Note: If the target delivery date is set to the same day the newsletter is created, you will be asked to confirm the delivery date. If the delivery date is confirmed, the newsletter cannot be edited again. The only action that can be taken to prevent the newsletter from going out is to delete it before it is picked up by the tickler.
Create HTML version of the email communication. The HTML version is not required.
Enter the Text Body for the email newsletter. The Text version is required.
Click the Save button to save the newsletter. If the date is set to the same day the newsletter will be sent, you will be prompted to confirm the date. See note above.
To view old newsletters, follow these steps:
Expand the Communication menu section.
Click the Newsletters link. The List of Newsletters page is displayed.
Click the View Old Newsletters link.
Select the number of days to search from the Display Newsletters from the last "number of days" drop list and click Go.
When the newsletter is located the following options are available:
Preview the old newsletter.
Clone the old newsletter as a starting point for adding a new newsletter.
Creating new Newsletter by Cloning Old Newsletters
Previous newsletters can be cloned. This clone feature enables an editor to start with an previously sent newsletter. Cloning is convenient when the new email communication is similar to a previously sent communication. This may occur when a communication must be sent repeatedly or if the new communication is similar is style to the old one and all that needs to be done is change some content.
To clone a previous newsletters, follow these steps:
Click on the Communication menu section to expand it.
Click the Newsletters link. The List of Newsletters page is displayed.
Click the View Old Newsletters link.
Select the number of days to search from the Display Newsletters from the last "number of days" drop list and click Go.
Click the Clone link next to the newsletter to clone it.
The Text and HTML version of the old newsletter will be copies from the old newsletter. Items that are not cloned include:
E-mail lists selection
Additional addresses
From Name
From E-mail address
A tag can be placed in both the HTML and Text versions of a newsletter that will insert a link to unsubscribe from the email list. To enable the unsubscribe feature do the following:
HTML version:
Cut and paste the unsubscribe tag in the HTML body.
Enter the link text that should be displayed to the recipient.
Tag:: $MC:NEWSLETTER_UNSUBSCRIBE:Custom Link Text Here$
Sample: $MC:NEWSLETTER_UNSUBSCRIBE:Please click here to remove yourself from this email list.$
When the recipient receives the newsletter, the link text will read Please click here to remove yourself from this email list.
The tag appears at the bottom of each body type so it can be cut and pasted into the HTML and Text version of the newsletter.
Click here to view tags in a newsletter.
Newsletter Tag placed in the HTML and Text body